Logging in
Macorva uses magic links, or sign-in links, to provide access. This is more secure than traditional username / password log-ins and integrates user authentication without additional steps.
- Go to app.macorva.com
- Enter in your company email or phone number and select Send a new sign-in link
- Check your email/phone and click the link in the message to sign in
For more details on logging in, click here
Org Chart
Macorva's integration with ADP completely automates org chart setup and management. After purchase, ADP org chart sync will be enabled. From there, your org chart will sync with your ADP system hourly based on changes you've made and perform a full sync weekly.
Setting user permissions
Users must have appropriate permissions within the CX module. Setting the appropriate permissions will allow users to create surveys, be reviewed by customers, send surveys, and view results.
- Navigate to Configure > People
- Search for the appropriate user you wish you assign permissions to
- Scroll down and select appropriate permissions for the user and select “Save”
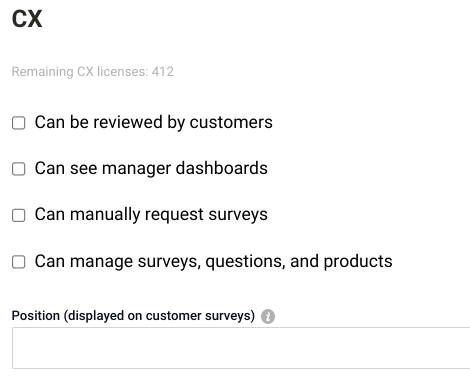
- Note users must have the “Can manage surveys, questions, and products” permission selected to create and manage surveys within Macorva.
Creating a CX Survey
Macorva allows you to capture feedback on a wide range of subjects. Note that a Macorva survey can include any or all of the following:
- Brand experience - Typically this is a Net Promoter Score (NPS) question, such as “How likely are you to recommend us to a friend or colleague?”
- Customer experience - Also known as customer satisfaction (CSAT), this is typically a question on how much the customer liked their visit, training session, support, etc.
- Customer effort score- Also known as CES, this typically is a question to determine how much effort is required on the part of the customer to achieve satisfaction in their experience.
- Employee experience - If one or more employees had a meaningful interaction, you can directly ask the customer to rate them. Macorva will show the employee's first name and profile picture.
- Product experience - This is a great way to get feedback on a product that a customer has used, consumed, etc.
- Open comments - Comments can tell a full story. Macorva recommends that common topics are added to positive and negative attributes so they can be directly tracked and trended.
- Once logged in, navigate to Configure > CX Surveys

- Choose a category for your survey and select + to create a new survey
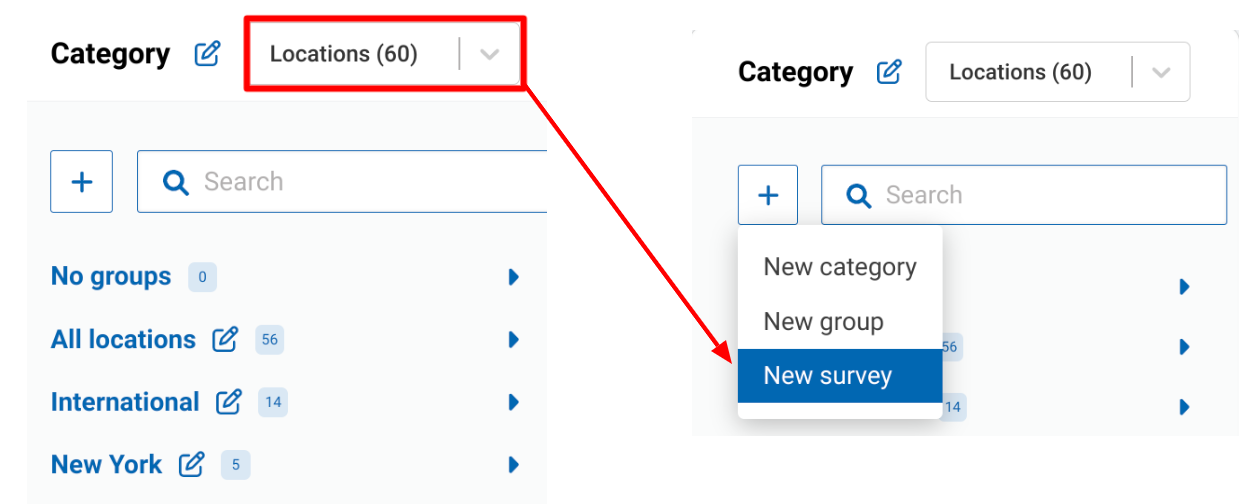
Within a category, you can also create groups of surveys to help further organize your surveys
- EX: Above you see the “Locations” category
- Within the category there are groups such as “International”, “New York"
- Name your survey
- Follow each section of the survey builder to add modules to the survey
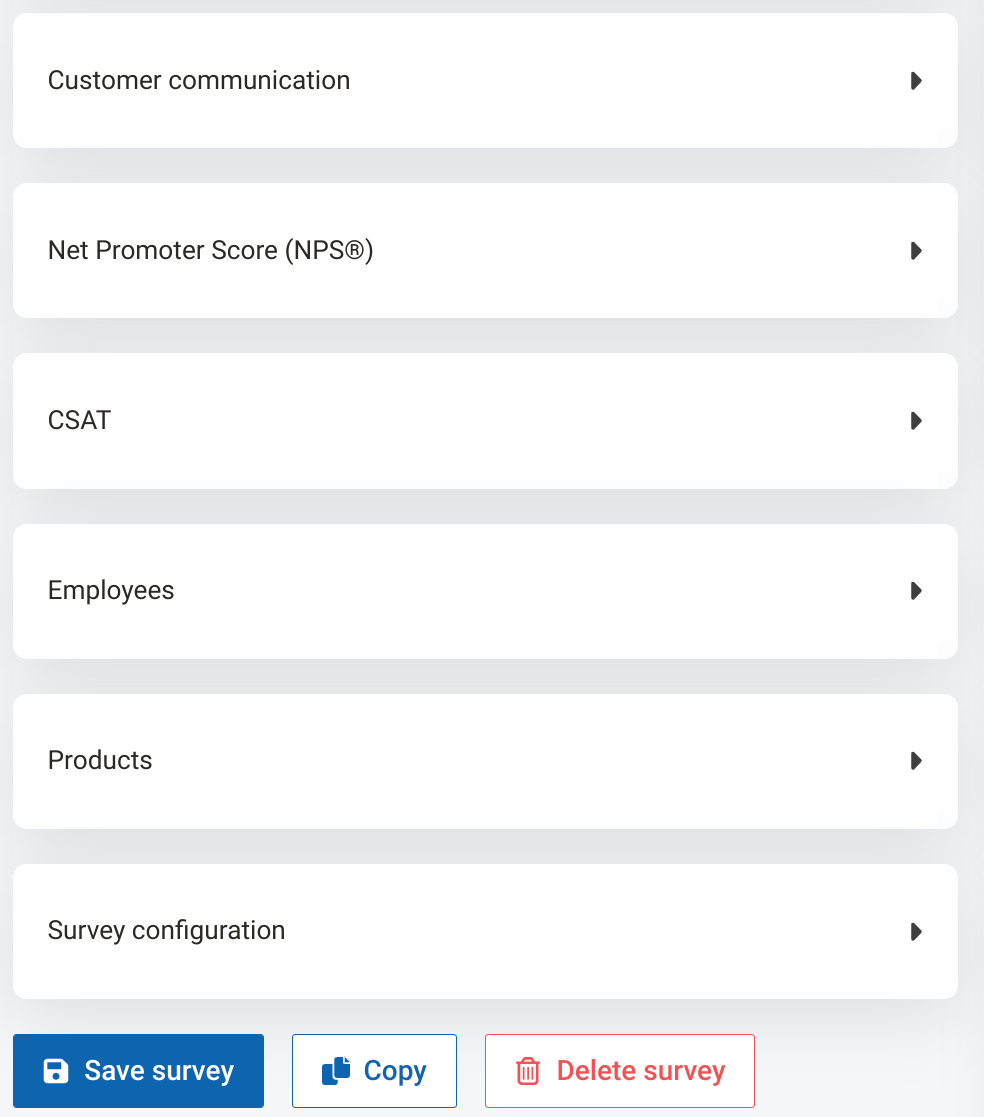
- Once you have added all questions, select “Save survey” to save your survey
For details on building a CX survey, click here
For details on creating custom CX questions, click here
For details on creating custom CX questions using AI, click here
How to send CX Surveys
Note: When sending CX surveys, you may use the “Notes” to enter in any additional information you may want to track about the survey or survey respondents. This field is searchable and can be used to filter data and create custom dashboards.
Manually sending surveys
- Navigate to Customers > Send Survey

- Select the appropriate CX survey and enter in customer details, employees, etc.
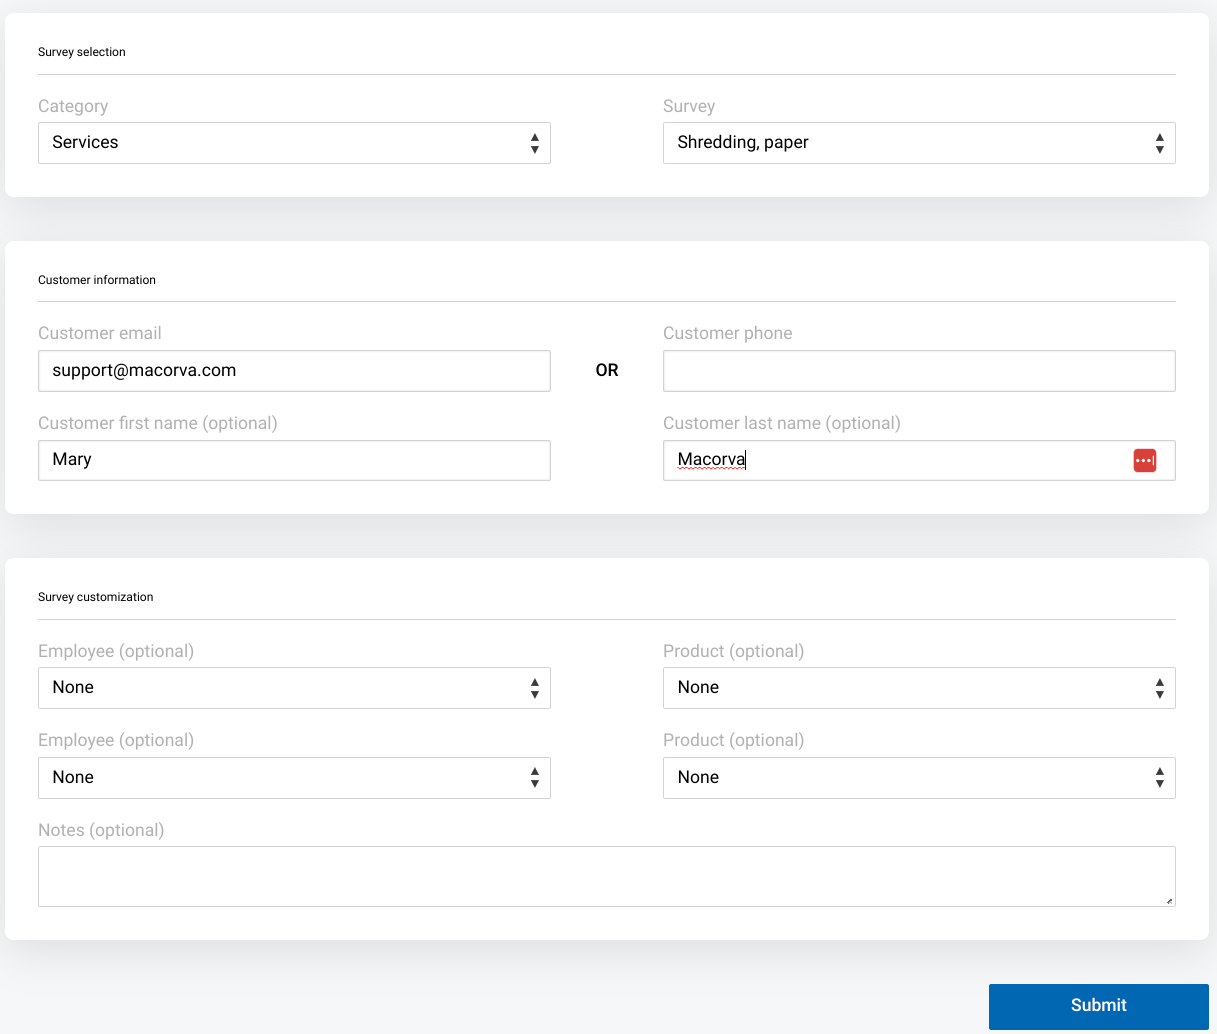
- Select “Submit”
Bulk sending surveys
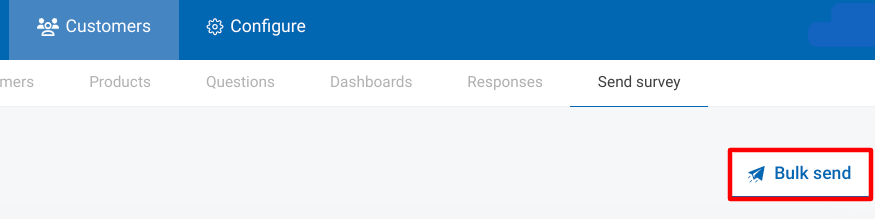
- Navigate to Customers > Send Survey
- Select “Bulk send”
- Download the bulk send template file, and fill with appropriate information
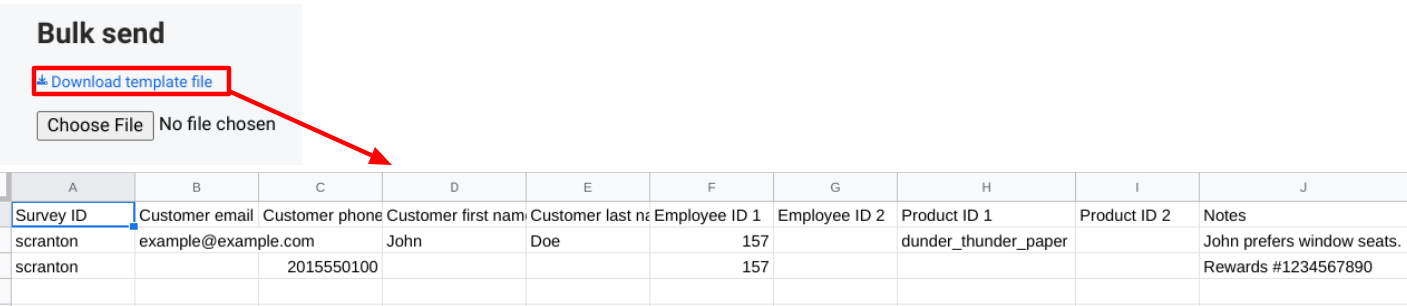
- Save your file as .csv and upload into Macorva
- Preview the data file and select “Send”
For details on bulk sending surveys, click here
Sending surveys via QR code
- Go to Configure > CX Surveys
- In the left Category column, select the survey you would like to edit, in the middle column, click Survey configuration
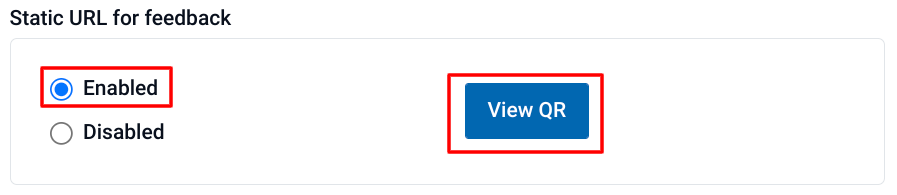
- Enable the Static URL option and click View QR code to download the image for use
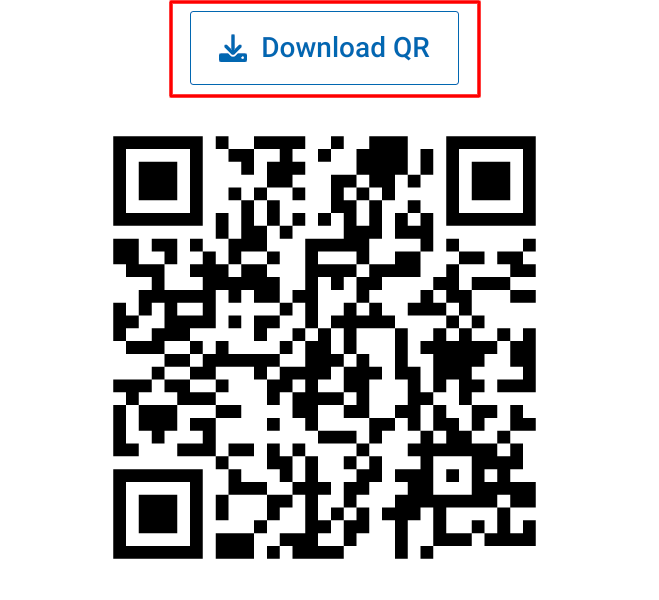
For a details on creating QR codes for CX surveys, click here
Automatically sending customer surveys
You may want to automatically send a survey after a support call or after a customer purchase. Any of these triggers can be used to have Macorva send a survey using:
- Salesforce App: Easily integrate Salesforce with Macorva using our app to send surveys using any number of triggers and then automatically return those results to that Salesforce record.
- Zapier: Zapier simplifies integration between 4000+ cloud-based tools without code. Connect Macorva to any number of products here.
- Genesys AppFoundry: Genesys users can easily integrate Macorva via our App.
-
RESTful API: Integrate using Macorva's public API with less than 10 lines of code. See our documentation and contact support@macorva.com for your API key.
Click here to download our API quick start guide
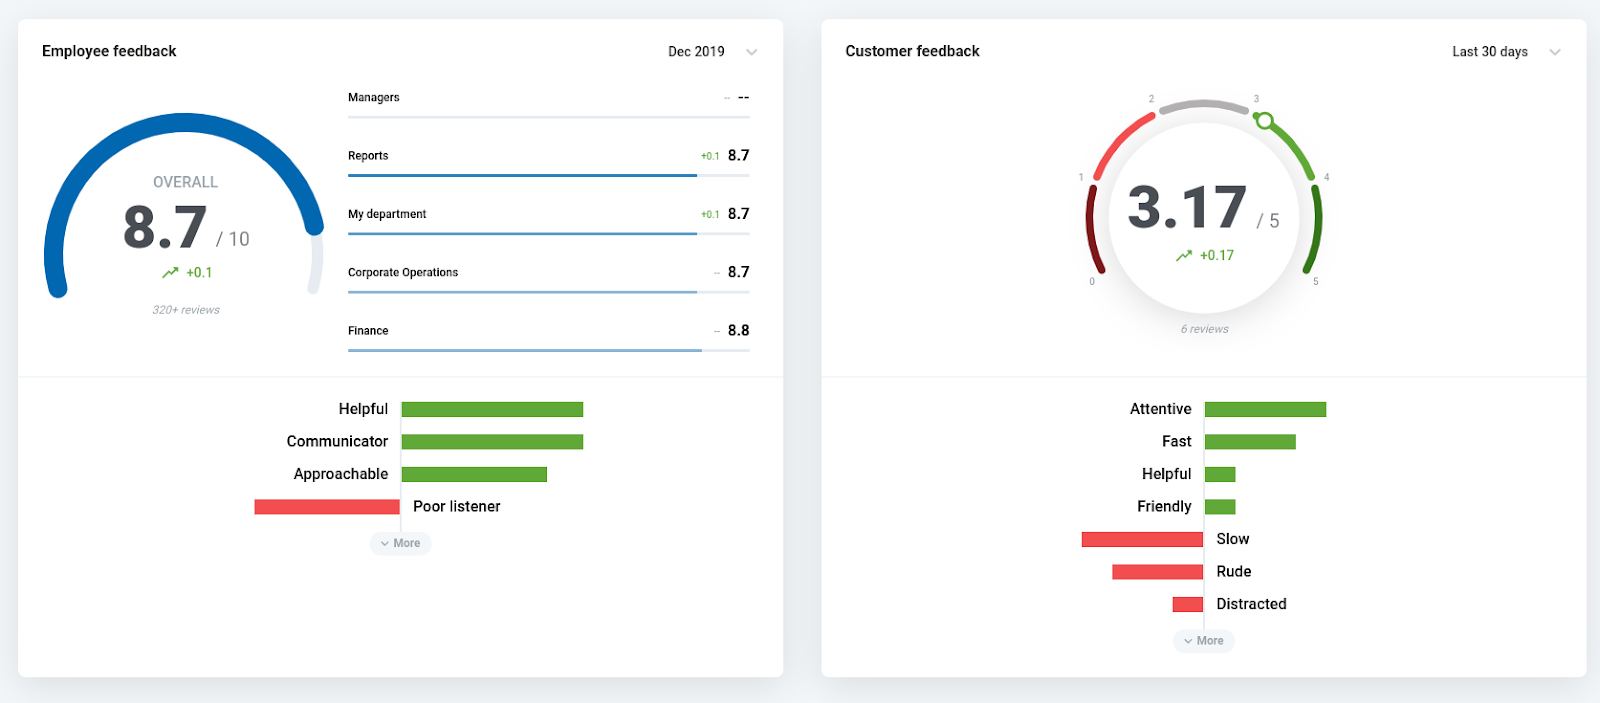
Viewing CX survey results
Via Customers
- Navigate to the Customers tab
- Select the appropriate survey you wish to view results for, and any specific date ranges
- Navigate to any of the different tabs to view different results for each survey:

Via Org chart
- Navigate to the Org Chart tab
- Select the appropriate employee you'd like to view survey results for by clicking the blue graph by their photo
- Select “Customer feedback” to view employees feedback from customers
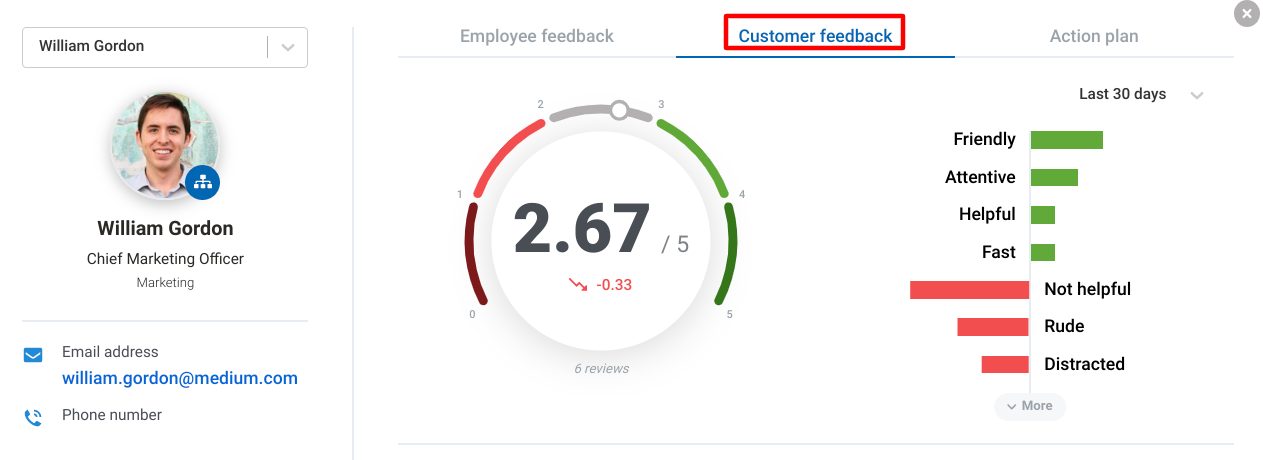
This provides you with a snapshot of the individual employee's results for CX surveys. Below this, you will also see Radiant AI action planning suggestions for this employee.
Note: You must have the “Can view manager dashboards” permission selected to view this information.
Employee users will have access to only their ratings via the Macorva home page:
See “Setting user permissions” above for information about permissions.
For more information on Radiant AI, click here
Exporting survey results
- Navigate to Customers > Responses
- Select “Export” to export data as .csv