Welcome!
We're excited to help you get started with Macorva CX so you can begin capturing and analyzing actionable customer experience feedback. Our user-friendly, mobile-first experience ensures you'll learn more from your customers' experiences than conventional survey tools.
Here's a quick rundown of the most important steps to help you get started.
Quick demo
Types of customer surveys
Types of customer surveys
Macorva allows you to capture feedback on a wide range of subjects. Note that a M...
Macorva makes it easy to capture meaningful feedback across many areas of the customer journey. Surveys can be tailored to include one or more of the following question types, depending on what insights you want to gather:
-
Brand experience - Captures how customers feel about your company as a whole, not just one product or service. It reflects their trust and loyalty to your brand, and is often measured using Net Promoter Score (NPS).
- Example: On a scale of 0-10, how likely are you to recommend us to a friend or colleague?
-
Customer experience (CSAT) - Focuses on a customer’s satisfaction (CSAT) with a specific interaction, service, or touchpoint (such as support, onboarding, or training). It helps pinpoint what parts of the journey are working well or need improvement.
- Overall, how satisfied were you with your support call today?
-
Customer effort score (CES) - Measures how easy it was for a customer to get their issue resolved or need fulfilled. A low-effort experience is a strong driver of customer loyalty, while high effort can lead to frustration and churn.
- Example: How easy was it to resolve your issue with our support team today?
-
Employee experience - Collects direct feedback about an employee a customer interacted with. Macorva will display the employee's first name and profile picture.
- Example: How would you rate the service you received from [Employee Name] today?
-
Product experience - Gathers feedback on a customer's satisfaction with a specific product they've used, consumed or purchased.
- Example: How well did this product meet your needs?
-
Open comments - Provides a space for customers to share detailed feedback in their own words. It helps you understand the "why" behind their ratings and can uncover important insights you didn't know to ask about. Macorva recommends that common topics are added to positive and negative attributes so they can be directly tracked and trended.
- Examples: Could you please tell us the primary reason for your score? OR Is there anything else you’d like to tell us about your experience?
What channels can I use to deliver surveys to customers?
What channels can I use to deliver surveys to customers?
With Macorva CX, you can send surveys directly to customers via: Email Text Mes...
With Macorva CX, you can send surveys directly to customers via:
- Email – Send surveys directly to a customer’s inbox for quick access.
- Text Message / SMS – Reach customers instantly on their phones with a link to complete the survey. It's perfect for quick surveys right after a service appointment, delivery, or purchase.
- QR Code – Place QR codes in physical locations so customers can scan and give feedback on the spot.
- Website Embed – Place surveys directly on your website, allowing customers to respond without leaving your site.
Lets get started!
How do I log into Macorva?
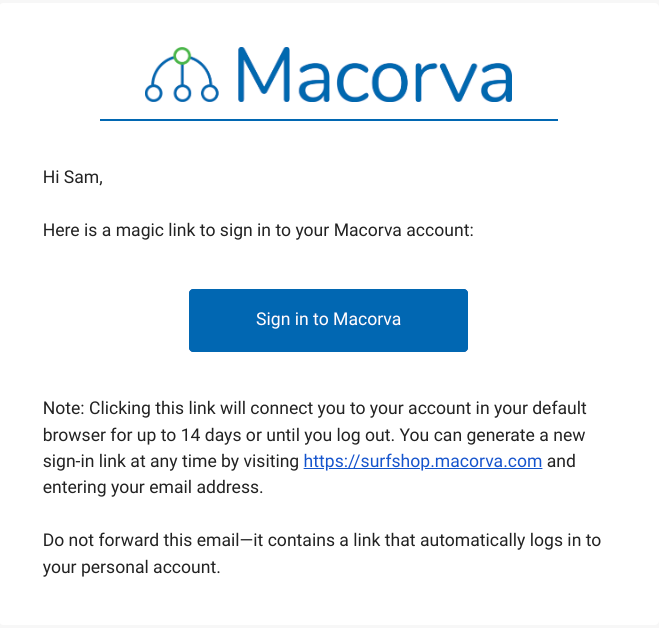
Macorva uses magic links, or sign-in links, to provide access. This is more secur...
Macorva uses magic links, or sign-in links, to provide access. This is more secure than traditional username / password log-ins and integrates user authentication without additional steps.
Optional: SSO / Okta Support
Some companies have SSO setup for their Macorva accounts. If your company has this option enabled, you may notice that you do not have to log in when you go to company.macorva.com. Note that the magic links we send to your email and phone will still work on personal devices, without requiring you to be logged in through your main company account.
To complete a survey or view results, simply click the link included in your email or text notification from Macorva. Clicking this link logs you in and automatically directs you to your open survey or personal results dashboard.
To request a new sign-in link:
- Go to app.macorva.com, enter in your company email address, and click Send a new sign-in link.
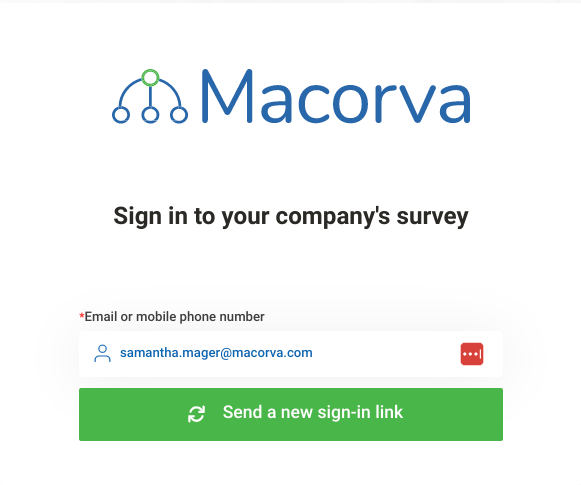
- Check your email or phone for a message from Macorva.
- Click the link in this message to sign in.
You can generate a new sign-in link at any time by going to app.macorva.com.
Setting up my org chart
Setting up my org chart
Configuring Macorva's org chart is your first step when implementing both EX and ...
Configuring Macorva's org chart is your first step when implementing both EX and CX plans. With the org chart, employees can see how your organization is structured, find the right person to contact for a project, look up contact information, review survey results, and more.
Our visual presentation helps employees put a name to a face, keeps your organization connected, and promotes transparency between leadership and employees. It's also the most flexible way to review EX survey results for yourself and your teams.
Rippling integration
How to integrate with Rippling
Integrating Macorva with Rippling automates the synchronization of your workforce data. By linking Rippling to Macorva, you ensure that engagement surveys, 360 feedback, and AI-generated performance reviews always reflect your current organizational structure.
Overview
Value of the Integration
- Eliminate Manual Data Entry: Stop exporting CSVs from your HRIS to run surveys. New hires and terminations in Rippling automatically create or deactivate accounts in Macorva.
- Automated Org Chart Mapping: Macorva uses Rippling’s manager-employee relationships to automatically route performance reviews and Radiant AI reports to the correct supervisors.
- One-Click Access: Enable SAML-based Single Sign-On (SSO) so employees can complete reviews and surveys directly from their Rippling dashboard.
Installation
Prerequisites
Before starting the installation in the Rippling App Shop, ensure the following items are ready:
- Macorva Account: You must have an active Macorva account. Please confirm with Macorva Support that your current plan supports the Rippling integration.
-
Company URL: Note your "Institution Identifier" when creating your account. If your Macorva app address is “company-name.macorva.com”, this is “company-name”.
-
Admin Matching: The administrator setting up the integration must have their Macorva User ID updated to match their Rippling ID.
-
To find your Rippling ID: Go to your Rippling employee list at https://app.rippling.com/employee-list/list. Find your User and click the entry. The ID is the alphanumeric string at the end of the URL (e.g., 1234567890abc...).
-
To find your Rippling ID: Go to your Rippling employee list at https://app.rippling.com/employee-list/list. Find your User and click the entry. The ID is the alphanumeric string at the end of the URL (e.g., 1234567890abc...).
- Email Consistency: If using SSO, ensure the administrator "Work email" matches exactly in both systems.


Setup Steps
- Navigate to the Rippling App Shop.
- Click Install.
-
When prompted for your Institution Identifier, enter the Macorva company identifier you noted during the prerequisites.
- Follow the Rippling prompts to authorize data sharing and map your desired fields.

Data Flows
Distinct Data Flows
- Employee Sync: Syncs name, email, and unique identifiers.
- Organizational Sync: Syncs managers, departments, locations, and divisions to build your Macorva org chart.
- SSO (SAML): Provides secure, one-click access for employees.
Triggers
- Automatic: Data flows trigger automatically on a recurring basis (typically daily) to capture changes made in Rippling.
- Event-Based: Specific changes in Rippling status can trigger near real-time Macorva updates.
Manual Triggers
If you need an immediate update (e.g., right before launching a company-wide survey), you can trigger a manual sync within the Macorva Configure > People tab.
FAQs & Troubleshooting
What are the "gotchas" to look out for?
The most common setup failure is the admin's ID not matching between systems. Ensure your Rippling ID is pasted into your Macorva profile before clicking "Install" in Rippling.
What happens if an employee is terminated in Rippling? The integration will detect the status change. Depending on your configuration, Macorva can automatically close their active surveys and trigger an automated Exit Survey.
How do I resolve a "User Not Found" error during SSO? This usually means the email address in Rippling does not match the email address in Macorva. Ensure "Work Email" is consistent in both systems.
ADP integration
Macorva's integration with ADP completely automates org chart setup and management. After purchase, Macorva's customer support team will enable syncing with your ADP account. From there, Macorva will sync with your ADP system hourly based on any changes you've made and perform a full sync weekly.
If you notice any discprepancies, email support@macorva.com.
Bulk upload via CSV
Creating your org chart via CSV upload is the most flexible method for quickly building your org chart via a bulk upload. Follow these steps to create your org chart:
- Log into Macorva with your admin account.
- On the top menu, go to Configure> People and select Bulk download/upload

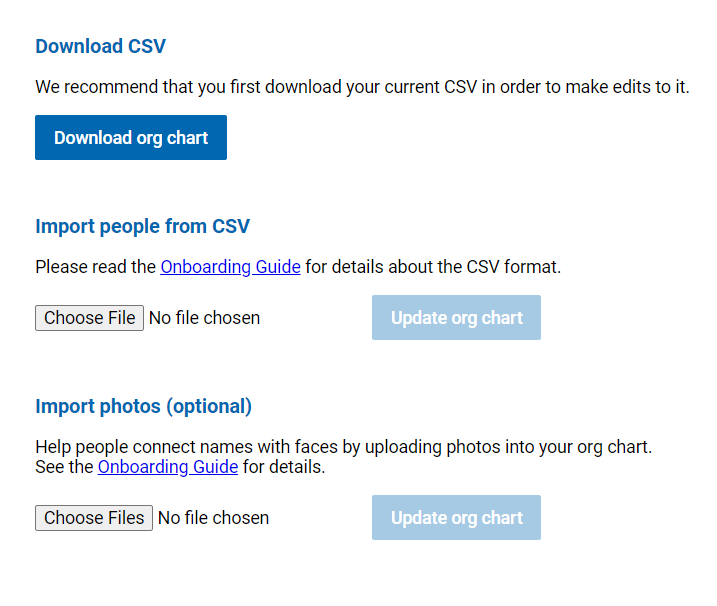
Recommended: Click Download org chart to download an editable *.csv template. The column titles in this file are already mapped to the correct contact variable. Just copy/paste your employee details into the file, save, upload under the Import people from CSV option, and click Update org chart.
Manual setup
Admin users can manage the org chart via Configure > People

From there, add new employees by selecting: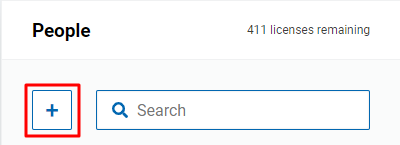
When adding a new employee, all required fields are noted and info bubbles provide additional details on hover.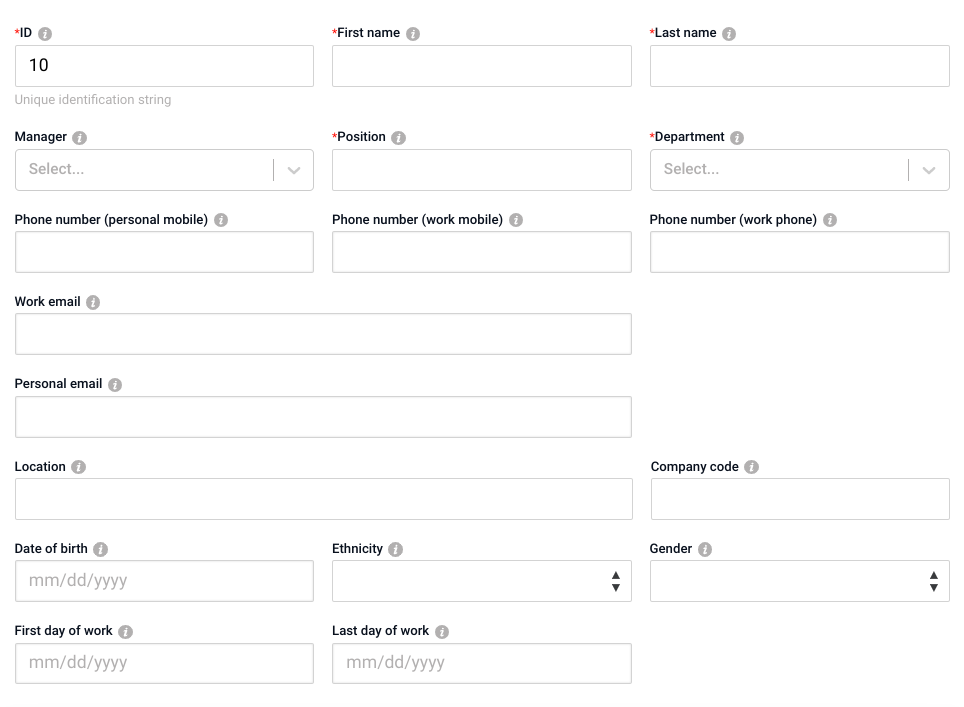
Note: An employee's manager determines their specific position within the org chart.
How do I make my first customer survey?
How do I make my first customer survey?
Users with survey management permissions can create and manage surveys via: Step ...
Users with survey management permissions can easily create and customize surveys. This guide will walk you through the process from start to finish.
Start a new survey
- Log into your Macorva admin account and go to Configure > Surveys

- Choose the appropriate Category for your survey by clicking on the dropdown arrow in the left box.
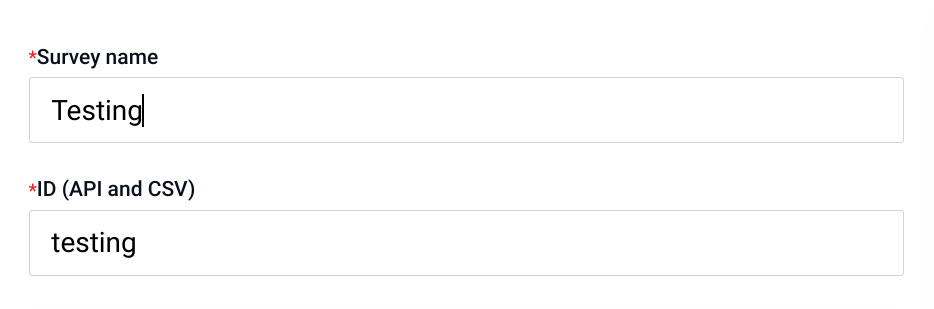
- Select the dropdown arrow under “No survey” and click + New survey.

- Add a Survey name and ID. This ID is is used to identify this specific survey when sending it via CSV upload or API.
Build and configure your survey
- You can now start building your survey using the sections in the survey builder. Each section includes default communication and questions to help you get started. To make any changes, click on the checkbox next to Use category default. As you make changes, a real-time preview will appear on the right side of your screen so you can instantly see how your survey will look.
-
Below is a quick overview of each section:
- Customer communication – Control your email/SMS templates and reminder schedule.
- Net Promoter Score (NPS) – Add an NPS question, with or without attributes. You can customize the attributes that customers can select to explain their rating.
- CSAT – Add CSAT questions (always includes attributes). Customize them with Default attributes.
- Employees and Products – You can also add questions to rate specific employees or products involved in the interaction.

- Use the Customer communication section to edit the email subject and text, as well as the SMS text that is sent out to your customers. You can also edit the reminder email subject and text, and set the maximum number of reminders and reminder frequency. (For more information, check out the How do I send and edit customer survey notifications? article.)
- Use the Net Promoter Score (NPS) section to add NPS to your surveys. NPS can be added with or without attributes and these attributes can be customized to fit your needs by clicking Default attributes. From here, you can add/remove negative or positive attributes.
-
Use the CSAT section to add CSAT to your surveys. CSAT always has attributes and they can be customized to fit your needs by clicking Default attributes. From here, you can add/remove negative or positive attributes.

- Use the Employees and Products sections to add and customize sections similar to the format of NPS/CSAT.
-
The Survey configuration section is where you can control the overall behavior and appearance of your survey. Key settings include:
- Select the appropriate Brand template.
- Set the Number of rating options (a 5 or 7 point scale).
- Enable Open comments and edit the prompt.
- Add additional questions. (For more information on this, check out our Creating custom survey questions article.)
- Add links to third-party Review sites (like Google or Yelp). (For more information on this, check out the How do I direct customers to give reviews on Google/Facebook/Yelp? article.)
- Update Additional follow-up criteria for when a response is flagged.
- Enabling or disabling a Static URL for feedback or Throttle surveys using the “CX survey interval”. (For more information on QR codes, check out the How do I create a QR code for a survey? article.)
Notifications
- The Summary and follow-up notifications section is where you may select a variety of reports to receive based on survey responses. To select any of these reports, simply click on the checkbox and type in the desired recipients.
- Radiant AI Summaries: These are digest reports that provide an overview of all survey responses. You can schedule these summaries to be sent Daily, Weekly, Biweekly, or Monthly to a selected list of recipients.
-
Follow-up Alerts: These are notifications for individual responses that require immediate attention, flagged either by our AI or by custom rules you've set in the Additional follow-up criteria section. You can choose to send these alerts Instantly as they arrive, or as a consolidated Daily list to specific recipients.

Save and Assign
- Once you're happy with the setup, click Save survey. Your survey is now ready to send!
- (Optional) To keep your surveys organized, you can assign them to a group. For example, you may organize your Locations into Regions by State. To create a group, click + New group and enter the group name. Then, select the appropriate survey and click Save Group.

For more advanced options, check out the following articles:
- How do I edit the customer survey notifications?
- Creating custom survey questions
- Using AI to create custom questions
- How do I direct customers to give reviews on Google/Facebook/Yelp?
- How do I create a QR code for a survey?
- How do I send my first survey?
- How to send surveys to a list of customers?
- Can I format the text in a custom question?
Why should I attach employees to my customer surveys?
Why should I attach employees to my customer surveys?
While many other customer survey tools focus on product ratings, net promoter sco...
Attaching employees to your customer surveys lets you connect feedback directly to the people who interacted with the customer. This makes the feedback more specific and actionable. For example, instead of only knowing a customer was “satisfied with support,” you’ll see that Sarah in Support received a 5-star rating. It also helps recognize top performers, identify coaching opportunities, and build accountability across teams.
While many other customer survey tools focus on product ratings, net promoter scores, or location and service ratings, Macorva lets you do all of this while also capturing employee-specific feedback.
This feedback is immediately collated and presented to that employee on their dashboard.

In the manager's dashboard, Radiant AI provides professional development suggestions specifically tailored to that employee.

How do I send my first survey?
How do I send my first survey?
After creating your first survey, test it by sending it to yourself. Step 1: Mak...
Congratulations, you’ve just created your first survey! The next critical step is to test it. Sending a practice survey to yourself is the best way to catch typos, test the user experience, and make sure your questions make sense before it goes out to customers.
Before you begin, make sure your user account has manual survey sending permissions enabled. (You can check this by going to Configure > People and finding your profile.)

Once you confirmed the survey permissions:
- Go to Surveys > Send survey.
- Select the Category and Survey you want to test.
- Enter your information as the customer.
- (Optional) Customize the survey by adding rating requests for employees and/or products, or by including a Note.
- Click Submit to send the survey to yourself. A green icon will populate in the upper right corner confirming the survey has been sent.
- Once the survey has been tested and you are satisfied, repeat these steps to manually send the survey to a customer.

How do I send surveys to a list of customers?
How to send surveys to a list of customers?
In many instances, you may want to send out different surveys to generated lists ...
Need to send a survey to a specific list of customers or prospects outside of your usual automated triggers? Macorva’s Bulk Send feature is the perfect tool for events like:
- Measuring customer loyalty
- Following up with trade show visitors
- Gathering feedback from sales training attendees
Macorva’s Bulk Send feature makes this simple. With it, you can upload a CSV file and send surveys directly to your list. This is especially useful for ad hoc or one-time survey needs.
Prepare your CSV file
Before you begin, create a CSV file with your contact list. You can download a pre-formatted template directly from the Bulk Send interface to make this easier. Your file should contain the following columns:
- Survey: The Survey ID for the survey you want to send to the customer. (Required)
- Email / Phone: The contact information for where to send the survey. (Required)
- First name / Last name: The customer's name. (Optional)
- Employee #: The Employee ID of the employee that may be reviewed. You can add columns for multiple employees (e.g., Employee 1, Employee 2). (Optional)
- Product #: The Product ID of the product that may be reviewed. You can add columns for multiple products. (Optional)
Upload and send your survey
To access the interface:
- Log into Macorva as an admin and go to Surveys > Send survey.
- Select Bulk send.
- Upload a CSV (using Drag and drop your CSV file here or click to browse).
- Click Upload in the bottom right corner.
- Click Validate and the system will begin checking the file for any errors or issues.

- Note: If there are any issues, an error message will pop up indicating which errors need to be corrected.

- If there are no issues, the imported data will be displayed in the table. Review before pressing Send.
Where do I review customer survey results?
Where do I review customer survey results?
Head to the Customers tab to review an entire suite of automatically built and up...
Head to the Surveys tab to access a full suite of automatically built reports that turn raw survey data into actionable insights. You can visualize trends, drill down into specifics, and even download full datasets for deeper analysis.

Start with the Big Picture
The Overview tab gives you a high-level snapshot of customer survey performance across your organization. It pulls together key metrics like NPS (Net Promoter Score), CSAT (Customer Satisfaction), Summary Sentiment, Needs Follow-up, Completion Rate, and Employee Ratings, showing both overall results and daily trends.
This tab also includes detailed completion statistics such as how many surveys were sent, how many were completed, and how they were delivered (email, SMS, or digital link).

Drill Down for Deeper Insights
My team: View your highest and lowest rated employees, plus a detailed results table with employee name, average ratings, number of ratings and employee drivers.

Categories: View your best-performing locations or services, and identify areas for improvement for these locations or services, plus details of the average ratings, NPS, average employee ratings, number of ratings, response rate and customer drivers.

Customers: Identify your happiest and least satisfied customers, along with customer details such as number of surveys sent, responses, average customer rating, average employee rating and total number of surveys.

Products: View your highest and lowest rated products, along with a detailed table of product details such as average rating, number of ratings, and product drivers.

Questions: View responses to survey questions.

Dashboards: Build and customize dashboards to highlight the metrics that matter most. (For further information on how to create a customized dashboard, check out this article.)

Responses: View a full list of individual responses and open comments, along with a word cloud chart and responses history.

Send Survey: Send surveys directly to customers from within the platform. (For further information on how to send surveys, check out this article.)

Data Access
Need to run your own analysis? All data is available for a full download as a CSV file or can be accessed directly via our API.
What can managers view versus employees in Macorva CX?
What can managers view versus employees in Macorva CX?
Users with Manager permissions in Macorva CX are able to view: CX rating dashboar...
Access in Macorva CX is based on user permissions. Managers have broader visibility into customer experience data, while employees see only their own ratings.
Managers can view
- View certain categories, groups or surveys as configured (see options below).

- Employee ratings through the Org Chart, allowing them to view feedback related to their direct reports and teams.
Employees can view
Their own ratings only, accessible directly from the Macorva homepage.

What's next?
We have several other articles that can help you customize the experience, automate sending, and dive deeper into the data. Have a look at the following to learn more:
Can I add custom questions?
Can I add custom customer questions?
Build and manage your own questions using the Macorva CX questions page. Step 1:...
Macorva gives you the flexibility to build a library of your own custom questions. Once a question is created, it's saved to your central library, allowing you to easily reuse it in any future survey without having to build it again.
This guide will walk you through creating a new question, understanding the different question types, and adding it to a survey.
Create a new custom question
- Log in to your Macorva admin account and go to Configure > Surveys.
- Select a survey or create a + New survey.
- From here, there are two ways to create a new custom question.
- Option 1: Survey Configuration
- Scroll down to the Survey Configuration section.
- Click the right arrow to expand.
- In the Additional questions section, click Customized Questions to open your question library.
- Scroll to the Available Questions section and click + Add new question.
- Option 2: Survey Preview
- Scroll to the bottom of the survey preview on the right side.
- Click Add/edit Questions.
- Scroll to the Available Questions section and click + Add new question.
- Option 1: Survey Configuration

- The New Question window will pop up. From here, select an existing Question group, or create a new group by selecting Edit groups. Question Groups allow you to group together similar questions to easily identify and add these to future surveys.
- You can customize every field of your question, and a live preview will appear on the right showing exactly how it will look to customers. Below, you’ll find examples of the different question types.
Question type
Here is a breakdown of the available question types and their settings. For all types, you will need to enter:
- Question Text: The actual question your customers will see. In this area, you can use the format toolbar to alter the text size, color, style, alignment of your question, or insert a horizontal line, sheet, or image. (Please see note at the bottom of this article for further formatting options.)
- Name: A short, internal name used for reporting and filtering.

Multiple Choice
Use for questions where customers can select one or more predefined answers.
- Display choices: Choose to show the options horizontally, vertically or as a dropdown. You can use the dropdown arrows on the right to see all options.
- Maximum number of selections: Set the number of choices a customer can select (e.g.,
1for a single choice, or a higher number for "Select all that apply"). - Answers: Enter the text for each of the answer choices.

Rating Scale
Use for questions that measure sentiment on a scale.
- Display Choices: Choose from a variety of visual styles, including Horizontal, Vertical, Slider, Stars, Faces, or as numbers.
- Scale: Select the range for your scale, such as
1-5,1-7, or0-10. - Labels: Customize the text labels for the scale's endpoints (e.g., "Bad" to "Amazing").

Free Text
Use for open-ended questions to collect qualitative feedback.
- Display choices: Choose the size of the text box: Single Line, Multiple Lines, or various Inline sizes.
- Enable sentiment analysis: Click if you'd like to perform sentiment analysis on responses.

Display Only
This is not a question but a way to add informational text, instructions, or a section break within your survey. It does not collect a response.
Dynamic Display Options
When creating a question, you can choose whether it:
- Always displays, or
- Displays dynamically (only if certain conditions are met based on other questions).
- If you'd like to dynamically display a question, click the button next to Dynamically display question.
- Set the criteria by selecting the condition and your selected answers.
You can add multiple conditions by clicking + Add new condition. For each new condition, choose whether it should be combined with the others using AND (all conditions must be true) or OR (any one condition can be true).

Save and Add Questions to Surveys
- Once all the previous steps have been completed. Click Save question. Once saved, the question will be added to your question library, and you’ll be taken back there automatically. From the library, you can insert the question into any of your surveys.
- Scroll to the appropriate Question group, and use the right arrow expand it.
- Select the checkbox next to your question to add it to the survey.
- New questions are added to the end of the survey by default. Use the drag handle on the left to reorder.

- Repeat as needed for additional custom questions.
- When finished, select Continue at the bottom right of the editor.
How does Macorva CX save and calculate results?
How does Macorva CX save and calculate results?
Macorva CX simplifies the management of survey results and contact information by...
Macorva CX simplifies the management of survey results and contact information by following these rules:
- Survey results
- Every click and tap is saved, but only completed surveys (submitted by clicking Submit) are included in reports.
- Response rate = number of completed surveys ÷ number of surveys sent.
- Contact Management
- If you send a survey to an email or phone number and later send another survey to that same contact but add a name, Macorva automatically updates the original contact with the new name.
- If a customer was previously identified only by phone/email, and a name is later added, Macorva will update the contact record with the name.
- Access to results
- Managers have configurable access to broader data sets, including location-specific results, all employee ratings within their team, and all customer comments.
- Employees have a focused view limited to their own performance. They can see their personal attributes and their average customer rating, but not the ratings or comments for their colleagues.
How do I create a QR code for a survey?
How do I create a QR code for a survey?
A simple way to capture survey data without proactively sending notifications is ...
A simple way to capture survey data without proactively sending notifications is by adding a QR code to business cards, placards, or other materials. You can also share a direct link in emails or on your website. Here’s how to set it up in Macorva:
- Log into your Macorva admin account and go to Configure > Surveys

- Select the survey Category from the left column, then choose the specific survey from the dropdowns on the right.
- Scroll down and click Survey configuration to expand the options.
- Scroll down to Static URL for feedback and select Enabled. (You may need to Save Survey before the View QR button is active.)
- Click View QR and a new window will pop up.
- (Optional) To include an employee rating on the survey, click into the search bar and search for their name.
- You’ll see a QR code automatically generated for the survey. Click Download QR to download the image and share with customers on posters or handouts, for example.

- If you'd like to add surveys to your website or email signatures, you can select the clipboard at the bottom to copy the survey URL.
How can I automate sending customer surveys?
How can I automate sending customer surveys?
Every customer interaction is an opportunity to gather feedback, but you don't wa...
Every customer interaction is an opportunity to gather feedback, but your business shouldn't have to slow down to collect it. Macorva integrates seamlessly into your existing workflows, allowing surveys to be sent automatically with little to no extra effort. For example, you may want to automatically send a survey after a support call or after a customer purchase.
Macorva offers several integration options to fit your systems:
- Salesforce App: Integrate Salesforce with Macorva to automatically send surveys based on any trigger you choose, and seamlessly return results directly to the related Salesforce record.
- Zapier: Use Zapier to connect Macorva with 4,000+ cloud-based tools—no coding required. Connect Macorva to any number of products here.
- Genesys AppFoundry: Genesys users can enable survey automation by installing Macorva’s AppFoundry integration here.
- RESTful API: Integrate using Macorva's public API with less than 10 lines of code. Check out our documentation and contact support@macorva.com for your API key.
Can I send customer survey notification reminders?
Can I send customer survey notification reminders?
It's common for customers to put off filling out surveys a day or more after rece...
Yes, you can send notification reminders for customer survey!
It's common for customers to put off filling out surveys a day or more after receiving their initial survey notification. One easy way to jog their memory is by sending a quick reminder.
Macorva makes it easy to configure and send reminder notifications on a per survey basis to help drive increased participation rates without annoying your customers.
For example, if you're sending a reminder for a simple transaction we recommend sending only one reminder. However, for more extensive interactions like a car rental or in home consultation, you may want to send 2-3 reminders spaced over a week.
To configure reminders on your survey:
- Log in as an admin and go to Configure > Surveys
- On the left, you’ll see the Category column dropdown. Select the survey category, then use the corresponding dropdown boxes on the right to choose the specific survey you want to edit.
- Scroll down to Customer communication and click the tab to expand it.

-
Scroll down to Send reminders. In this section, you can set the reminder frequency, the maximum number of reminders to send, and customizing the reminder's email and SMS text. Each section is automatically set to the category default setting. To edit/customize any of these fields, click on the check box and make changes within the text box.

-
When finished, select Save Survey at the bottom to apply your changes.
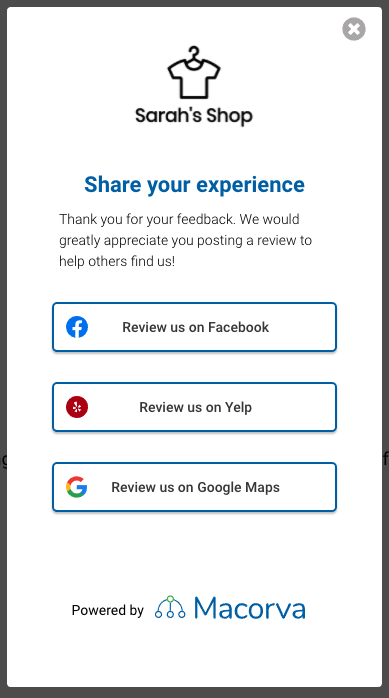
How do I direct customers to give reviews on Google/Facebook/Yelp?
How do I direct customers to give reviews on Google/Facebook/Yelp?
Log into Macorva as an admin, then to go ⚙ Configure → CX surveys. In the left...
- Navigate to Configure > CX surveys

- In the left Category column, select the survey you would like to edit.
- To ask happy customers (those who rate their experience a 4 or 5) to give feedback on your Google, Facebook, and/or Yelp business pages, click Use default review sites in the middle column:

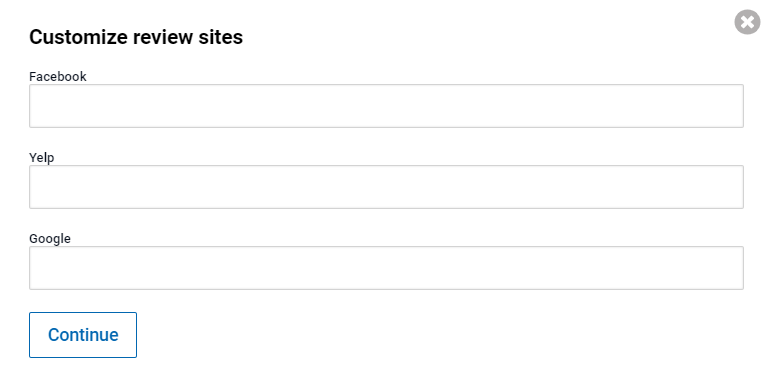
- Enter your business page URLs for each platform you would like to direct happy customers to
- Select Continue
- Select Save survey to save changes
Let us know how we can help!
Macorva support is always here to answer any of your questions and help you get the most out of your employee experience surveys. Reach out to support@macorva.com with any questions.